Saturday, November 30, 2013

Warley 2103

Warley satndOff we go again to the NEC. It's not far and we're demonstrating so there's not even a layout to lug. 4 plastic crates bought from Wilkos for a whopping £3 each contained everything we needed apart from the modelling board and some drinks. Dropping the contents out of the back of the car took 2 minutes once we were inside.

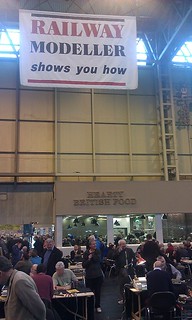
Our stand faced the Oaks restaurant. No problem there. What was less good was to be under the "Railway Modeller Shows You How" banner dangling from the ceiling. I mean, after all the magazine moving I've done this year, we get to be directly under one I'm not involved with? Someone is taking the p**s methinks...

(OK, I know it's not deliberate. Still funny though!)

Anyway, I get back from the car park hike and we set up. Close proximity to the large open doors prevents everything being put in place but most of it was ready in case the next days arrival was tight to opening time.

As it was I needn't have worried. Our train (yes, it's the one show we can do as exhibitors by train, so we do on the Saturday) got us in with 3/4 of an hour to go. Arriving at the hall we pushed out was through the large crowd awaiting advanced ticket entry. I wouldn't fancy being on the Bachmann stand just inside the entrance with that lot waiting to pounce.

Being much further in, we had time to set up and then indulge in an excellent sausage bap from the restaurant. This was a good plan because once the crowds arrived we didn't surface until 3:30pm. No chance of lunch, too many questions to answer and people to chat to.

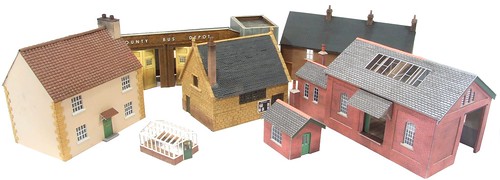
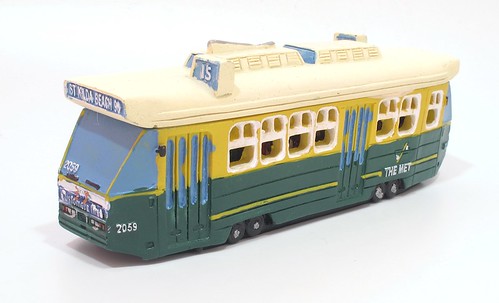
The display was made up of models I've built for Hornby Mag, BRM and MBRDL during the last year. Each was labeled with the issue and magazine but despite this, we spent a lot of time explaining that they had appeared in print to many visitors. Once the idea was grasped, many went away in search of back-numbers.

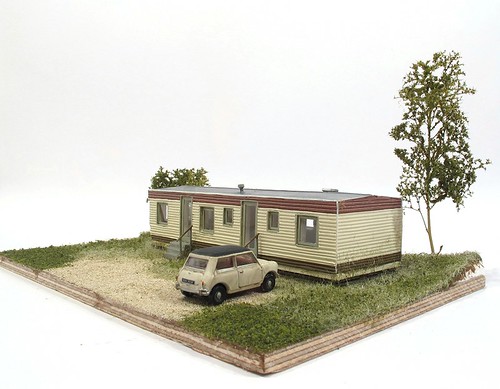
Not as much time though as we spent explaining sand. One of the dioramas on show was my beach scene and it seems this really caught the imagination of visitors. Tuesdays chinchilla sand post stemmed from this as at least 20 people wanted to know more during the weekend. A couple also wanted to buy the model, which makes me think perhaps I should be selling these as "art".

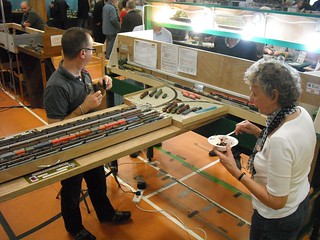
By the end of the show, we'd seen next to nothing. My Dad was getting good at answering the repeated questions and no modelling at all had been done. That's a good demo as far as I'm concerned - we're there to answer questions, not build trains.

Learning from previous years, we didn't head for the first train back but caught the air-rail link over to the airport. There, the Wetherspoons pub failed to have any of the meals we tried to order in stock but Frankie & Benny's did much better with fast service and an excellent spag-bol. Many visitors forget the airport for food but once you've made it as far as the station, it's only 2 minutes further and you get to ride the maglev successor into the bargain.

Anyway, Sunday we're in the car and all is as normal. Sausage batch is consumed and the show opens. Crowds are lighter then Saturday but it seems that all at once we are descended upon by people we know. One friend I used to work with has brought her family so hubby can learn more about model railways for the layout he's building for the kids (yeah, right). Another friend from Banbury club is there and once from Leamington.

Cheesecake
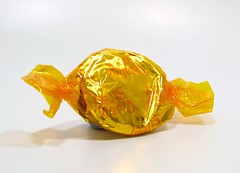
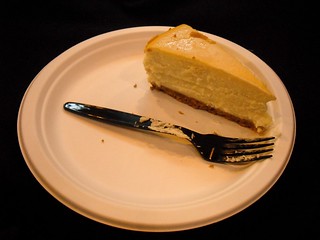
Before this though, the highlight of the show. A reader of this blog, whose name will be kept secret to avoid embarrassment, dropped off some cheesecake as a thank you for my efforts. The cake was delicious and it was absolutely wonderful.

I'm dead chuffed that I'm entertaining you all enough and as it happens, I hadn't had any cake to write about by this point. Mind you, my old colleague foolishly suggested it was far too early for cake - she's wrong. It's never too early for cake!

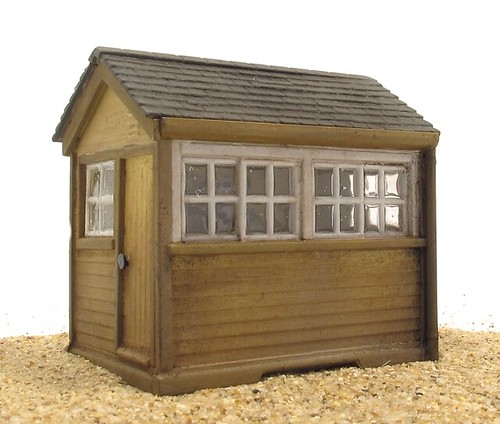
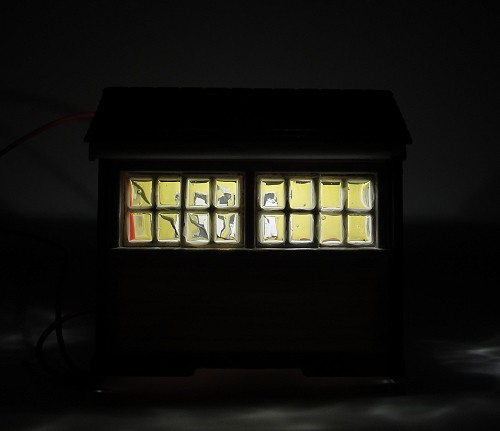
The crowds might have been less fulsome but we still chatted away. My model building supplement in the latest BRM proved popular with many people making their way across the hall to pick up a copy. Hornby garden sheds sold out with at least one retailer too as people decided to have a go at pretty beach huts.

Numbering
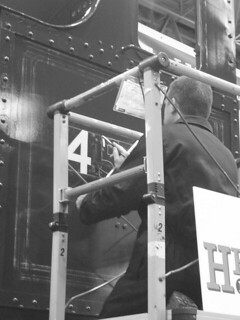
At least I managed to get a bit of a look around. I think the highlight was watching a proper sign writer at work on the Patriot loco "The Unknown Warrior" and later on a Corris coach. Seeing a craftsman at work is humbling and puts my own bodgery into perspective.

Seeing the Hattons/Heljan Garratt in action makes me think I've done the right thing pre-ordering mine. It was even the right version - rotating bunker and unweathered. Sadly there were too many cameras around for me to pick mine up early and I suspect I'd have been rugby tackled by half the crowd before reaching the exit had I tried.

The other highlight was the number of MREmag readers who dropped by to sat hello. Writing and editing happens in a bit of a vacuum so it's lovely to see some faces of real people, most of whoom were polite enough to say nice things as well.

Layout of the show? For me, Worecester South Quay I think. I've a bit of the thing for quirky micro layouts and this was tiny O gauge but with loads of atmosphere. Mind you, I didn't see that much but I bet it would have been hard to beat.

Worcester South Quay bridge

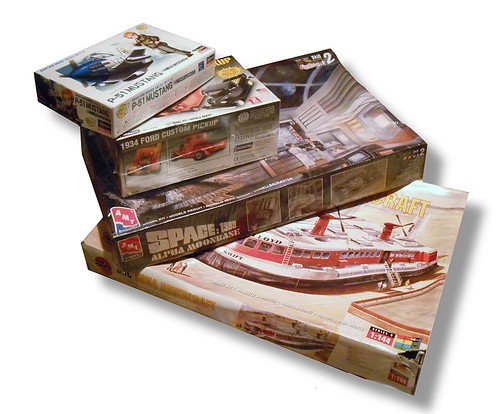
Trade-wise. I bought an RT Models Sentinel kit. I don't need any more loco kits but it is a prototype that has been high on my list of wants for many years. I even know how it will look when finished. All I need to do is find the time. On top of this, Matt Dawson dropped off a bag of unwanted kits and bits. Quite a few blog projects in here as well as some frustration I think. Watch this space.

Demo packed and ready to goExiting the hall, we'd decided to avoid last years "fun" with the NEC security leaving me cruising the road system for 45 minutes unable to get near the hall or go back in a car park.

Changes had been made by the organisers but on the basis that one less car in the hall is welcome, we packed our stand back in its crates, lashed the lot to a trolley with a couple of bungee cords and walked it back to the car park. Half an hour after closing, we are on the road which can't be a bad thing.

While we didn't see much, it was still and excellent show. Thanks very much to all those who dropped by. I hope we were able to help you a bit and perhaps even inspire some modelling. Don't forget that if you need help, the "Ask Phil" button is only a click away on the top right of this very page.

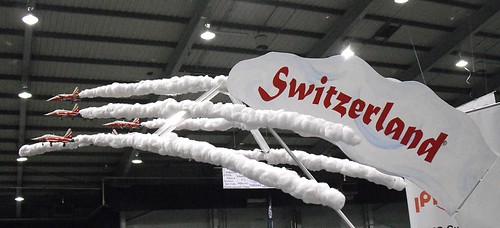
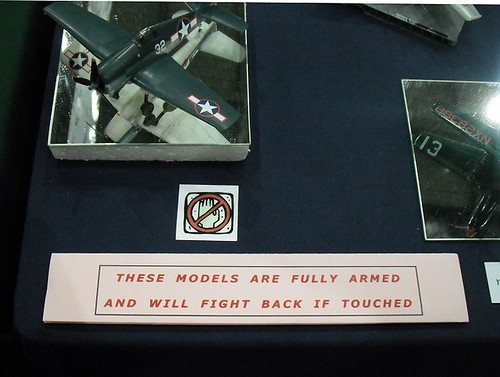
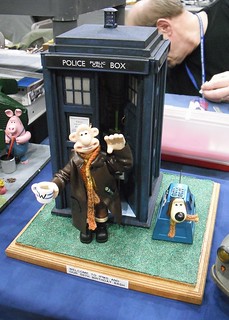
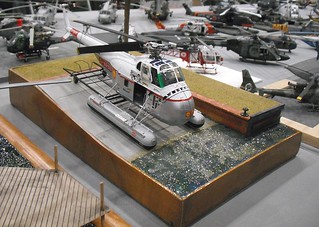
Warley NEC photos on Flickr

Friday, November 29, 2013

Making corrugated iron in 4mm scale

On Monday, James asked:
Since you seem to be on a 101 uses for tin foil theme at the moment I'd love to see if you can find an easy way to produce 4mm corrugated iron using it. I've had great success in 16mm using a readily available crimper, but there doesn't seem to be a small scale equivalent.

Making tin
 
My method evolved when I needed some corrugated iron but had no money as a youth. With a large building I wanted to cover, I spotted that the roof of a recently bought Wills kit for a scrapyard might act as a press for me to make my own from tin foil.
 
Most of the kit has long since gone to the great model shop in the sky but the roof remains. Any time I need corrugated iron, I whip out the tin foil, cut it into scale 6 X 2 sheets and press these into the roof with my fleshy fingers.
 
Maybe the result isn't quite as clearly defined as plastic or a proper press tool would achieve, The sheets are pretty fragile too - poke one and you'll squash the corrugations - but it is stupidly cheap to do and looks the part on a model.


Thursday, November 28, 2013

Humbrol Clear and other products

Shiny plane

My egg-plane modelling is a chance to test a few products that I've little or no practical experience with on a project that doesn't really matter. I mean, I'd like it to look good in the end but if anything goes wrong, the world won't end. More to the point, no editor is going to shout at me.

Anyway, it's decals (English: Transfers) time. For a tiny model, there are a heck of a lot of them. Generally, the quality is very good indeed. They handle well and sit nicely on the model. If I were picky I'd suggest that they are a bit on the thick side. Mind you, I still managed to break a couple through incompetent handling...

In an effort to get things sitting in the panel lines I tried some Humbrol DecalFix. Maybe the transfers were a bit thick but it didn't seem to make any difference. On the other hand, they were pretty good already with no obvious silvering around the edges so maybe I'm asking too much.

After this, I painted the exhaust ports with Mr Metal Color copper paint - applied by brush it's a fabulous colour. Very metal looking and with plenty of body. Possibly not quite right for the prototype but since we are going a bit manga, who cares?

Finally, with everything allowed to dry overnight, I sprayed the model with Humbrol Clear.

This is the famous paint companies version of the much-missed Johnsons Klear floor polish. Basically an acrylic gloss varnish but still available on the market instead of fetching eBay prices more appropriate to vintage champagne.

No thinning was required for spraying although I did have to fiddle with the air settings for a descent mist. After this, it went on well and dried quickly with the aid of a hair drier. Everything seems to be gloss, even the yellow bits of tail that were matt originally.

And in case anyone wonders, the screw sticking out of the cockpit is fixed through the hole that will eventually locate the pilot. It just provided me with a convenient handle.

Wednesday, November 27, 2013

Book Review: Kit Building for Railway Modellers. Vol 2 - Locomotives and Multiple Units by George Dent

It's a good start to read the first few words of any book and completely agree with them. The author opens with this passage:

Pride may be one of the seven deadly sins, but there is little to match the hubris of watching a kit-built vehicle moving smoothly around the layout under its own power. Better still if it is finished to a realistic standard, perhaps with a descent weathering job or carrying some intricate detailing that wasn't part of the the original kit. And if it's something grand such as a steam engine, with working connecting rods and valve gear, then it's hard not to let the sense of achievement overwhelm you.

All of which pretty much sums up my feelings toward kit-building model locomotives. I know it looks scary but once you master it, there is no better feeling in our hobby.

Unlike most books covering locomotive building, this one kicks off the practical side of things by looking at plastic and resin kits. We don't see any metalwork until chapter 7 - 74 pages in. This reflects the way the world has changed and possibly also the more pragmatic stance taken by someone used to writing for model railway magazines aimed at the less-skilled audience. Far better to ease them in to loco building with projects that don't require a soldering iron then scare them off.

Of course we can't escape metal and a couple of chapters cover the basics including the dreadful black art of soldering. Each area of the model is examines - chassis basic, bogies, trucks, motors and gears, power collection, waggly bits and testing.

Finally there is painting and finishing. Although some of the later has been covered in the authors other books in far greater detail, it's nice that we get the whole process in a single volume. Every step is well illustrated with colour photos, much in the manner of a modern model railway magazine.

Well recommended, even for those of us veterans of many kits. For those looking to dip a toe in the water, this is £19.99 well spent.

Kit Building for Railway Modellers: Volume 2 - Locomotives and Multiple Units at Amazon

Tuesday, November 26, 2013

Chinchilla sand

Chinchilla Sand
Over the weekend, I spent a lot of time trying to explain where I purchased some Chinchilla sand from.

The sand is ideal for modelling as it's clean and very, very fine.

For modellers, it has the added advantage that it's stupidly cheap too.

I have used the stuff for fine sand on a beach in it's unpainted form. It's also been pressed into service anywhere I need to add a bit of texture to the ground cover so I mix it in paint, plaster and even ash.

Most people were interested to know where it came from and here I got the facts a bit mixed up. I remembered £2.46 for a litre.

It's actually £2.75 for 1.5 litres. Including delivery.

My pack came from MedicAnimal.com I hope this helps anyone looking for it.

Monday, November 25, 2013

Making grass tufts

Making tuftsIt's taken me a long while to buy a static grass tool. The little Noch puffer bottle works OK but if I need electric fibres, I made a cheapo tool using a tea strainer and fly-swat. This works OK too except when I manage to give myself a shock with it.

Ever more work making model railways means that I finally persuaded myself that £75 for a Greescene Flockit device was worth the investment.

The tool sat on the shelf for a few weeks until I needed to make grass on a diorama. Before hitting something for a magazine, I thought I'd better give it a go on something else. I remembered seeing a demo where it is used to make little grass tufts on kitchen silver foil so thought I'd have a go at that. Everyone needs tufts sometimes don't they?

In the battery compartment, I discovered that a good quality PP3 is included so plugged it in, clipped the earth lead to the foil, spotted this with PVA and had a go.

TuftThe results are very nice. Initial worries that the fibres would fall straight out of the hopper thanks to the large gauge were unfounded.

Shaking the device in the manner of a sonic screwdriver over the sheet saw little nylon fibres attracted to the glue. A few seconds later they all looked nice an hairy.

This made me think. You can buy tufts like these, almost certainly made the same way. Cost for 92 tufts is £11.00

This means if I need 628 over the lifetime of the tool, if I ignore the tiny cost of fibres, then I'm in profit!

Sunday, November 24, 2013

Dentists are worse for railway modellers

Dental Probes

Monday afternoon saw me making a trip to see Mr Ubi, my dentist. One of my old fillings needed replacing and at the same time he would take care of a hairline crack in the same tooth that had pushed me toward ambient temperature food as anything else hurt.

I know my dentist is good. People have said that when he numbs your jaw, you don't feel the injection. You don't look forward to a trip to the tooth doctors but at least if you feel you're going to be able to eat ice cream and hamburgers then it's worth it.

Best of all, as far as I was concerned, was he explained what was happening as we went along. I'm genuinely interested in what's going on in my gob, especially since I own a toolkit not unlike his. I also know how rubbish I am at using it.

Dental burrs in a whitemetal loco? I've chewed away bits I didn't intent to. The dentist can't bodge them back with low-melt solder either, or at least not in my mouth.

Those picks, they are very handy sometimes but I know how sharp the ends are and mine bash around in the toolbox. His are presumably properly looked after and not bought from a tool stall at a toy train show. When he scrapes, all I can do is wonder at the strength of tooth enamel.

Saturday, November 23, 2013

Pig in a poke boat

Red speedboat

One of the few things I bought at the Model Boat show a couple of weeks ago, came from the Howes Models second hand boat stall.

Among the models built by enthusiasts being sold off was a pile of Ripmax Magic Vee boats that had been returned as faulty. Temptingly marked up at a fiver a go, they presumably would have been binned if people like me hadn't come along and bought them.

No details were available of the faults and you couldn't test them before purchase, but as the model is normally 50 quid, it didn't seem too much of a risk.

Anyway, the model is quite nice. It comes with a wheel type transmitter. I paid up and picked one of the few red hulled vessels in the pile of yellow ones.

Back home, I was pleasingly surprised to find a 9V battery in the transmitter. No such luck with the boat which normally comes with a rechargeable pack. Lashing up some power it quickly became apparent that the speed control/receiver unit was duff. The steering servo worked and the motor made a beeping noise but didn't turn.

So, did I waste my money?

I don't think so.

Looking at the model as a source of parts, the servo is worth the fiver paid. In addition I can use all the running gear in one of the small George Turner models in my stash of kits. According to Ripmax, the motor is worth £4.75, prop a pound, driveshaft three quid and rudder two. Even the 9V battery has some sort of value!

For the moment I've stashed the bits away awaiting use. Not that I need more boat bits but it is a fun way to acquire them.

Friday, November 22, 2013

Packing up for Warley

Time to pack my bags and head off to the Warley National Model Railway Exhibition at the NEC.

You can find me on stand E23 in the demonstration area with the usual title "Parker's Guide".

With me will be my Dad (Well, it does say Parkers plural) and some of the projects I've built for both Hornby Magazine and British Railway Modelling.

I'm not sure which ones at the moment as whatever goes in the car needs to fit on to a trolley for a fast and easy exit at the end of the show. This year I really don't want to try and get my car from the car park to near the hall. That way leads to arguments with the security guards and endless circuits of the NEC road system awaiting the moment when they let vehicles near the doors!

Anyway, please do come along and say hello. It's always nice to meet blog readers and I'm not planning to get anything useful done, that's just to while away any quiet times. As a friend once said, if you get any modelling done then it wasn't a good demo!

Warley National Exhibition website

Thursday, November 21, 2013

Tin foil masking


Masked1The P51 isn't just shiny metal, no, it needs some colour too. Normally I'd be inclined to brush paint these as I'm not very good at masking things. Well, it always seems to be a load of trouble and I prefer working with a brush, especially when you have panel lines to follow.

However, this time I was determined to do the job "right" so the tail fin was masked with Tamiya tape (buy the refills, they are cheaper than the new stuff and just the same except you don't get a plastic holder) cut into narrow strips.

To cover most of the plane, kitchen aluminium foil was wrapped around the model and secured to the Tamya tape with normal masking tape.

Masked2Foil works better than paper for this job as it stays put when you wrap it around the model - paper has to be stuck in place or in inevitably flaps just when the spray is pointing in that direction. Well, it does for me anyway.

After spraying with yellow acrylic, the masking was removed. My lining up hadn't been perfect but the excess paint was peeled off with a cocktail stick so all looks OK.

At the front, a similar trick was used for the blue nose. I even re-used the foil. I was impressed with the way the Tamiya tape stuck over the engine exhaust ports. It had been touch and go whether I'd stick these in place before painting and now I'm glad I did.

This time the paint used was a glass enamel. Like the acrylic, it adhered to the Mr Color paint perfectly well. The base coat had enjoyed a couple of days drying time in a dust-free box. How long you need to leave it before being able to peel off tape without lifting is a mystery since the instructions on the bottle are in Japanese.

Painted

Wednesday, November 20, 2013

Painting stainless steel

MrMetalFirst innovation (well, new product to me) on the egg Mustang is Mr Metal Color paint.

I was sent some samples of this a few months ago. Testing for review, it worked well when brushed but I never got around to spraying it.

Now though, I've broken out the airbrush and given the egg plane a coat. Not knowing what I should use, I tried some white spirit. This worked OK although I could probably have got away without it as the paint is very thin.

You do need to give it a good mix before use as the pigment drops out of the carrier as you watch. This didn't seem to affect the finish which worked out very well. I used a grey car primer base coat as I expected the colour density wouldn't be great. Not sure if this made a difference but I would have been interested to see how it worked over a white primer. Maybe the silver would have been brighter.

By the way, I know I should have used a bright silver. Real P-51s were very shiny after all. Trouble was, in the selection I'd been sent, this was the closest. Anyway, the idea is to test some new materials.

You'll notice I chickened out of masking the canopy. Previous experience shows this paint brushes well so that's my plan. Far easier to do that anyway.

Stainless Back end

Tuesday, November 19, 2013

P-51 Mustang egg plane

Eggy MustangHere's an odd concept - Hasegawa's Egg Planes. Cartoon versions of real aeroplanes that are sort of egg shaped. A bit of Manga cartoon styling is thrown into the mix with the big eyed lady pilots. They are the sort of thing you either love or hate.

I've seen them in the past and though they look like a bit of fun. Finally I've got around to building one.

This isn't a daft project, well not completely, it's a way to try different model making techniques on a project that doesn't really matter. In this case, I'm going to experiment with some painting ideas.

Anyway, the model I picked is the P-51 Mustang. The model is a pretty standard plastic aircraft kit - all the bits are on sprues, you assemble the two halves of the fuselage and then stick the wings on. So far, so Airfix.

The clear canopy is large and will allow a clear view of the nicely detailed pilot. There's not detail in the cockpit apart from a decal showing dials but then it's not a real plane...

Part fit is good. The white blob of filler in front of the cockpit is me being over enthusiastic with the knife removing the bits from the sprue. The instructions are clear but I still managed to fit the undercarriage back to front. I'm sure no one will notice though.

Eggy Mustang builtup

Monday, November 18, 2013

Building Skipper Riley

It's cartoon aeroplanes week here at Phil's Workbench!

We start with the Zvezda kit for "Skipper Riley" - a character from the Disney film "Planes". Obviously, the model is based on a US Navy Cosair. Characters based on transport vehicles, I wonder where they got that idea from?

Corsair KitbitsAnyway, on the box it is described as "My First Model Kit" and suitable for ages 7 and upward. The scale is even marked as 1:100. Therefore, my tester was my Dad who is ten times the recommended age but does have a 3mm:1foot scale model railway at the correct scale.

In the box, all the parts are supplied on self coloured plastic sprues. Your builder will need to remove these with a knife or pair of clippers. At 7, under adult supervision, a craft knife shouldn't be too scary a concept. You learn how not to cut yourself pretty quickly after all.

Assembly doesn't require glue, or at least not for the main parts. My tester reports that a couple of the beige parts needed a little trimming for a good fit. He used a knife but sandpaper would work just as well. The tiny landing gear parts didn't stay put when pushed in place so he used some Humbrol plastic cement to hold them.

Instead of transfers, the model is decorated with stickers. These look great but the glue on them grabs quickly so make sure they are placed in the correct spot first time as you won't get them off again.

Quickly buildable into a good looking model, if you have a fan of the film, this would make an excellent introduction to plastic kit modelling. They will learn some hand/eye co-ordination and motor skills and get a descent toy as a result. The finished model has a 14cm wingspan so a complete fleet won't take up huge amounts of space. I know you can buy ready-made versions of the same planes but where's the fun in that?

Skipper Riley


Planes kits at Amazon

Sunday, November 17, 2013

International Model Boat Show 2013

SunshinePossibly the most coveniant show I take part in has to be the International Model Boat show at the Warwickshire Exhibition Centre. 10 minutes drive from home along the Fosse Way, we see 1 set of traffic lights and a roundabout. Even the parking is easy as long as you keep your wheels near the hard stuff while on the field.

Anyway, after setting up on Thursday evening we found that our stand was bigger than expected. This allowed for a nicely spaced out display. There is a tendency at these events to cram as many models into as small a space as possible making it difficult for visitors to get a proper look at anything.

The display was in a new location within the hall. Central but without our normal view of the boating pool. The layout worked well but it was a shame not to be able to watch the action. Mind you, we've been lucky the last few years so I can't complain.

Friday was very busy with crowds from the opening. Traders seemed to be doing excellent business with many people wandering around with big bags of goodies. I wouldn't say that the trade had changed much from last year but the selection on offer is very good with most of the stuff you need for the hobby being on sale.

Saturday was spent at the IPMS show but I was back on station for Sunday. The highlight of the day as far as I'm concerned is the 2-minute Remembrance Sunday silence. Always well respected, it's particularly affecting to be somewhere where you don't have to take part but everyone does.

To follow the silence, vintage pinup and burlesque artist Kitten von Mew (Web site safe for work as long as you are careful where you click) sang some appropriately war-time songs. In fact she performed 3 times during the day although the sound didn't really carry down to our bit of the show. The audience around the pool seemed to like it though and wandering up, it was a nice and unusual addition to the show. ]#

Douglas Head Ferry

Club stands were as usual, very interesting, The Manx model boat club rightly won the best in show award with a large display full of top quality models including the best Waverly paddle steamer I've seen and an automatic operating dredger (Video here).

Our weekend went well with several potential new members talked to. Three live within 5 miles of our waters and didn't know of the club - that's now fixed and we hope to welcome them on board soon. The only downside was a lack of heating on the last day. Friday was warm but the heater above our heats went off at about 10am and never came back on. In November, any exhibition hall is cool and this one downright cold! I can see why some clubs sell branded fleeces to their members - we could have done with some as it looks smarter than wearing coats on the stand.

Anyway, I did manage to avoid buying any new kits for the collection. Piles of plasticard and many lengths of wood though - well you can't easily buy the larger sheet sizes can you? And the wood will come in handy one day and it was a bargain...

Lots of photos on Flickr for you.

Saturday, November 16, 2013

IPMS, Telford 2013

MarvinTHE event for plastic kit enthusiasts. Three massive halls, plus lectures, plus a competition room plus a Bring & Buy. This is a huge event but despite this, as we walked from the station to the Telford International Centre, we passed 3 people heading the other way clutching bags of kits.

This was 45 minutes after the exhibition had opened.

How?

Entering the hall, our first stop was to bag a very early lunch of the messiest pork bap ever. Pork, stuffing and apple sauce was very yummy and conveniently filling but didn't half get everywhere. You are supposed to wash your hands before eating, not afterwards...

Anyway, into the halls, the plan was to go to the furthest one and work back. This nearly worked except I was distracted by a collection of Si-Fi models including Marvin from The Hitchhikers Guide to the Galaxy TV series, a Dalek, ORAC and Liberator from Blakes 7 and several other very good things. I don't like having my picture taken but the chance to be snapped beside Marvin was too good to pass up.

Next, we headed off to the far side only to find two helicopters, some US troops and three more Daleks. As you do.

Switzerland

After this, we worked back through the displays and trade stands. This really is an international event with exhibitors coming from as far away as Canada. Most of Europe was well represented and these guys seemed to have plenty of space left in their cars, or at least they did when they arrived but that was all going to be filled with boxes of plastic parts. Well, you can't go to a show without buying something can you? And if that show if hundreds of miles away, you need to buy more to remember the trip by.

Do Not Touch

If the origins of the exhibitors didn't interest you, the special interest groups (SIGS) would. Every topic under the sun seems to have a group of people who are fascinated by it and reproduce it in miniature. Movies? Check. Sports cars? Check. South American airlines? Check.

Trade was excellent. There are many plastic kit dealers who buy up collections of unbuilt kits (who has any of those...) and then re-sell than at very reasonable prices. The stands were tall and enclosed and full of wondrous boxes, many for less than a fiver.

Dr Who?You could also find, at the other end of the price scale, some specialists would sell very short run kits for obscure subjects or ones done is such detail that very few people would be up to the job of assembly. A 1/32nd PBY aircraft with the most incredible interior detail fitted the bill here. I didn't ask the price, just marvelled at the intricate detail.

Talking of detail, there was even one stand that just sold scale bolts and rivets. He had an awful lot of different types too. I didn't count them though.

So, we got in at 11:15 and left 5 hours later. Realistically, 2 halls were well explored. The third less so. Tiredness and plastic fatigue set in. A 2 day pass wouldn't be a bad idea in future although I don't fancy commuting to Telford or staying in a local hotel. That would eat into the budget for models.

ChopperWhich brings me back to the people we saw at the start. How can you knock off a show like that in half an hour? Why would you go in, paying a tenner for the privilege, just to pick up a bag of pre-ordered kits? Add in the cost of travel and you would be much better off paying postage. If you aren't going to look around that is.

Me? Well, although I don't need any more kits and kept repeating that mantra, I came away with a few. Specifically an Airfix hovercraft (missing a few tiny parts but an absolute bargain), Moon base Alpha (Space 1999), 3-in-1 Ford pickup (My Dad built these as a youth and has a display full so I fancy a go) and an egg-plane. No railway or boat items you note. Well, when you build toy trains all day, a change is as good as a rest.

I used a lot of digital film on this show. There were so many cracking models to photograph and I did no more than scratch the surface. Anyway the results are on Flickr for your entertainment.

Kit Stash

Friday, November 15, 2013

The best garden shed in the world?

Garden Building

Sorting old photos, I dug out this rather poor shot taken in a back garden that had been turned into an amateur railway museum.

As you can see, it's a ground level signal box in GWR colours, not unlike the one I built last week. Better still, I'm taking the shot from another signal box, hence the reflection in the glass. As I recall, we spent a pleasant evening in there playing with the levers - which are all attached to shortened signals (As an aside, you don't need planning permission to erect a 1/3rd tall signal but you do for a full height one).

Our box was lit by gas and the sound of the bubbling flame on a quiet evening watching the sun setting was fabulous.

It's a pity the canes for the runner beans got in the way of the photo but you can't have everything. It would make a nice model though.

Finished Hut

Thursday, November 14, 2013

Lots of buildings in BRM

Lots and lots of goodies in British Railway Modelling this month. Even if we ignore the content from people who aren't me, and it's my blog so that's what we are going to do, there is still a bumper crop.

First up, the 2 hour challenge - Building a diesel fuelling point. Using a Knightwing plastic kit, lashings of static grass and a strong cup of tea, my diesel locos now have somewhere to pose while being refueled.

Fuel Point and 08

Note: I should mention that the excellent Modelling British Railways Diesel Locomotives is still available. Get yourself a copy today! And if you've got a copy, get another so you can keep it pristine!

Inspired by a corner of the "Diesels in the Dutchy" layout, I've made a diorama based on a static caravan. While you shouldn't really model a model, sometimes you see (or at least I do) a scene and think, "I'd like something like that on my layout." Well, here you go. A quick and simple space-filler.

Static Caravan

And finally (drum roll), there's a special model buildings supplement where I build 2 cardboard structures, a plastic kit, defile a Bachmann Pendon building, get out in the garden with a laser-cut greenhouse and scratchbuild some cottages. There is an awful lot of this so dig in and enjoy. I think I need a lie down...

All the buildings
 
You even get some Christmas present suggestions if anyone is thinking of writing to Santa for me!

More on the December issue of British Railway Modelling here.

Wednesday, November 13, 2013

Top of the pole

Pole detailA slightly random Wednesday photo for you - the top of a telegraph pole from above.

The view is from Birmingham Moor Street station and appealed to me 'cos you don't often see poles from this angle.

We tend to assume telegraph pole = brown but this one is as green as the nearby foliage. Dipping a model version into a bottle of Humbrol Weathering powder in the same way you dip the liquorice into a sherbet dip would be the order of the day.

Also "interesting" is the ring of wire that the wires attach too. Reasonably easy to do but a nice touch. On the other hand, I suspect that only etching could do justice to the steps on the side. Not sure if I'd be keen enough to buy a back of etched telegraph pole steps myself, but I bet there's someone out there who would!

Tuesday, November 12, 2013

Low relief buidings and bridges in Hornby Magazine Yearbook

Down south, something stirs...

A few years ago, Hornby Magazine started on a rather large layout with the mysterious name "Project 12". It started and then abruptly stopped. Readers asked what had happened for a while but the answers were deliberately non-committal.

The truth was that the office had moved from East Anglia to the midlands and there wasn't the space to build the model. It went into store and Topley Dale was built and featured in the 2012 yearbook.

2013 rolls around and the mag are again in need of a layout. By now a new tin garage offers just enough space for the scenic section to be built and the layout emerges from store. After some re-planning and quite a few changes from its earlier incarnation, the model is now called "Twelve Trees Junction". All looks good except for a rapidly advancing deadline.

This is where I come in.

Along the back of the layout there is a street and since the setting is urban, this street needs buildings. Big, urban ones.

I'm presented with a box of Skytrex castings and left to my own devices. Weeks later, I've painted these, weathered them and scratchbuilt a factory.

At the same time, I've also been building a large bow girder bridge to cross the tracks where they exit on one leg of the junction. This turns out to be a bigger and more complicated job than I though, mainly because drawing a 24 inch diameter circle is harder than I thought.

Anyway, all the exploits are written up in the latest yearbook for your education and entertainment. If Southern Region is your bag, or you just like reading about modelling, follow the link below:

Hornby Magazine Yearbook No.6 on Amazon

Monday, November 11, 2013

A happy face for Monday morning

FAceUp

One from the old photos files - a spare face from the Severn Valley Railways "Thomas the Tank" day.

Sunday, November 10, 2013

Australian Tram

St Kilda Tram

My mate Tim has just been to Australia. On his return, we were standing in the pub reacquainting him with proper British beer and he produced this model as a gift for me.

The prototype is a Melbourne Z1 class tram. As any fule know, these differ form the Z3 class by only having 2 doors as opposed the later trams three per side. Built 1975 to 1978, they can still be found on the streets of the city today, although not on Route 15.

The scale appears to be 1cm to 1 metre along the body and something else vertically. The model is cast in resin and made in two parts. Inside there are some oddly proportioned passengers.

Pedants will point out that the front end is nearer in design to a Z3 tram. Presumably this was easier to model than the correct round headlamps.


I'm afraid that if the Antipodeans wish to challenge the likes of Bachmann or Hornby, they are going to have to try harder than this. While pleasing to the eye, it hasn't even got a motor. As for the details - all moulded in I'm afraid. And nowhere to put a DCC chip?
 
Note: I'm kidding. It's a fantastic souvenir and I'm chuffed to have been given it.

Saturday, November 09, 2013

WYCRAIL 2013

Cakes 2Some shows last a day. Some shows last 2. Some shows last a day but should last 2 'cos they are so good. Wycrail fills this last category.

31 high-quality layouts and loads of trade. All in a roomy and light, if a little warm, venue. Best of all, excellent quality, reasonably priced, cake.

Just off the M40 motorway, we arrived about 15 minutes before opening and despite the odd spot of drizzle, the queue was long and wide.

Inside, you find yourself in a high-roofed hall which is light an airy. Along one side there were layouts, on the other, cake. We got collared for tombola tickets very quickly. Sadly, the Toy Story train set eluded us but a bottle of orange Fruit Shoot was won and kept my Dad refreshed when we weren't drinking tea.

Heading towards the Bring & Buy stall, we found ourselves in a 1st floor sports hall. This is the first time I've gone upstairs to a sports hall, they are normally a ground level room.Still, it worked and I suppose there is no reason why you shouldn't have one in a modern building.

First stop was to abuse Chris Nevard who seemed to be hiding his micro layout behind some camera apparatus. Apparently he was taking photos, not trying to hide from rabid RMWeb members who might spot a missing rivet or two.

One more unusual thing about Wycrail - they have layouts based on johnny foreigners prototypes. And some of them are very good indeed. We had American, Italian and German(I think) prototypes. I was very taken with one of the American dockside ones which had a realistic (to my eye) jumble of clapperboard wooden buildings. Most seemed to be offering specialist entertainment and I don't mean S4 modelling!

American Entertainment

One highlight was chatting to the owner of Corris when he pulled out a plastic box from under the layout and showed me some part-scratchbuilt 009 locos he was working on. They were tiny, included double reduction gearboxes with the motor hidden in the firebox and most unexpected of all, the con-rods were doing the job they are meant to. He admitted that like me he'd been told that in N and 009, powered axles have to be linked with gears but his rods do their job and do it well so this isn't as hard and fast a rule as it appears.

Corris locos

N gauge layout "Lofthole Oil" had a couple of surprises too. First, on the front was an operating digger complete with control box so the crowd could have a go. It was being monopolised by youths so I didn't get a play but it looked impressive all the same.

Lofthole Oil Fiddle YardAround the back, a fiddle yard sticks out of the running looks (it's a roundy-roundy) allowing the yard to service both up and down lines. A much more efficient system than the traditional series of loops although at the price of increased floor space.

Trade-wise, I got most of the items on my shopping list and a few that weren't so that's all good.

Anyway, lots of pictures for you to enjoy here:

Wycrail photos on Flickr

Friday, November 08, 2013

Signalling hut - finished

Finished Hut

After all the work, a few finishing touches were required to complete the hut. The back half of the roof was fixed in place - the moulding wasn't nearly as sharp as the one used on the front, something I've noticed on Wills kits before.

After painting with Humbrol colours sort-of right for the GWR livery the real thing wears, a wash of track colour and light dusting with weathering powders finished the job.

It's a nice little model and like most Wills kits, very pleasant to put together. I know I've filled a lot of posts with the build but you could do the same job in an evening. It's just that I have a lot of work on at the moment so need to spin these things out to meet my post-a-day intentions.

And in case you are wondering why the model is sat on sand, the wires coming out of the bottom don't let it sit flat on a surface. When installed on a layout, I'll drill a hole for them to exit the baseboard.

Thursday, November 07, 2013

The colour of light

WhiteLight

So, after Tuesday's efforts, my signal cabin lights up at night, but it looks a bit modern.

RoundToffeeBack in the good old days, lights were powered by gas or oil rather than electricity. The illumination tended to be poor and a distinctly yellow shade.

My lights were bright white but no matter. The solution is wrapped around a toffee from Quality Street. The yellow cellophane can be cut to size and glued over the LED strip.

The results speak for themselves.

Yellow Light
 
 
Note: In these views, the lights are running from a 9V PP3 battery.