I thought I'd got my weathering methods pretty much sorted by now. Run some dirt in the crevices, a little dry brushing and finish up with a waft of dirt colour from the airbrush. It seems not.
First up, the dirt seems happy to sit everywhere except the crevices. They remain much free and simply glowing with shinny blue paint.
The dry brushing goes OK but when I move on to the airbrush I can't get the paint to sit properly. Yet again the cracks and valleys refuse to fill and glow even brighter when I take the model into daylight. So I put more paint on, which doesn't help and the finish starts to look like silt rather than airborne muck.
So I clean everything off with turps and cotton buds. I kid myself that this will give the effect of a machine that has been cleaned by hand. It's not bad but still not right.
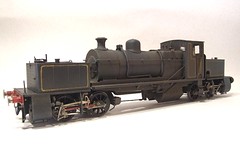
Finally a fresh mix of dark browns and rusts is wafted over everything and finally seems to tie the finish together. I've probably gone further than originally planned but this was a mucky beast. A blast of thinned grey along the top of the boiler and tanks looks nice as though smoke has settled .
Finishing touches came courtesy of weathering powders. Those crevices, especially behind the pipework, had grey and brown dirt powder forced into them. The very slightly sticky paint aided this process and I'm confident that it won't fall out when the model is handled.
Phew.
No comments:
Post a Comment